Friday, September 18, 2009

CHA Summer Report: DinoTalk Talking Envelopes

I was sent a few of these recordable gift card holders to check out after I saw them at CHA and I must say, I love them!  A few months ago I was looking for a recordable card to give to my daughter's teacher.  She loves to hear my daughter's laugh so I though it would be fun to record that for her.  The recordable cards I found in the stores (if they had any!) were expensive ($6-$8) and weren't appropriate for our occasion.  I wish I had known about these back then!  They have a whole line of recordable products so you can even make your own recordable cards with their paper! 

Check out this video I made (with my daughter's help) featuring this product and what I did with it. 

This is a brand new product and I'm still waiting to hear back on where it will be available.  I'll keep you all posted!  In the meantime, I've got an extra one that I'll send to a facebook fan.  Become a fan before Sept. 23rd to enter!

Labels: , , , , , , ,

Related Posts Widget for Blogs by LinkWithin
Bookmark and Share

Saturday, July 11, 2009

Make. Ponytail Holders

This is a project I blogged about almost a year ago on Crafty Conservative.    I still make these pretty regularly.  In fact, I keep all the supplies near my bed so I can whip up a pair or two while watching tv at night.  They make a great present!

They are fairly straightforward.  All you need is some felt, embroidery floss, a needle and some ponytail holders. 

I free-handed the flower to be a size I wanted.  I cut it out on paper first and then started cutting out the felt shapes. 

The flowers are double thick and embroidered together using a running stitch. 

I attach them to the ponytail holder by sewing around the rubber band.  I go around and around at least 20 times.  I haven't had any problems with them falling off. 

Labels: , , , , , , ,

Related Posts Widget for Blogs by LinkWithin
Bookmark and Share

Friday, May 01, 2009

Make. Knitted Babes.

Last summer I bought the book, Knitted Babes.   My kids love these dolls so much that I finally had to hide the book.  They kept asking me to make them and they expected them to be done RIGHT THEN!  The pressure was too much so I hid it.  Out of sight, out of mind. 

The other day I was cleaning out part of my craft room and my daughter found the book.  She was so excited to find it and began to pick out her new doll.  She was so particular and didn't change her mind at all after two days so I decided to go ahead and make it for her.IMG_1968 

If you check out this post from last summer, you'll notice that I had the most problems with the face.  This time I decided to use premade eyes and it made all the difference!  I used a small piece of felt for the mouth (cut into a tiny heart) and her nose and eyelashes are embroidery floss.  The hair was really fun to do and I think I'll add some more braids to thicken it out eventually.

I fudged a little on the pattern for the clothes.  I made a one piece leotard and made the tutu separate.  I was particularly clever with the tutu (in my opinion).  I used a hair elastic!  It fit perfectly around her waist and then I just tied on the tulle strips until it was covered.   

IMG_1970I had the doll hidden until today.  She still needs ballet slippers but the pattern in the book is a little fiddly and I think I can do it better.  These could be famous last words, of course.  As soon as I started taking the picture, my daughter saw the doll and has taken her away for an adventure.  She named her Jo Jo. 

Labels: , , , , ,

Related Posts Widget for Blogs by LinkWithin
Bookmark and Share

Friday, April 17, 2009

Learn. How to Make a Fabric Covered Button

I've got a video tutorial for you today.  It features my daughter dressed like Dorothy from the Wizard of Oz.  She loves Dorothy so I thought I'd use this button kit I've had for a while and make her some fabric covered button ponytails.  So easy!  So quick!  So cheap!  Enjoy.

Labels: , , , , , , ,

Related Posts Widget for Blogs by LinkWithin
Bookmark and Share

Tuesday, February 03, 2009

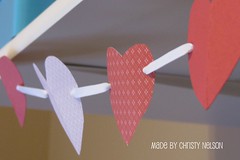
Make. No Sew Valentine Heart Garland

No Sew Valentine Heart Garland

This heart garland was made because I am mostly a lazy crafter. I wanted to make a little heart garland like some I've seen where they sew paper in a sewing machine. But, I realized that I have blue thread in my machine and I was too lazy to change it. Instead, I came up with a different way to hang my heart garland and I like it a lot!

No Sew Valentine Heart Garland

You need the most basic of supplies. Paper, scissors, ribbon, and a hole punch. I used double sided designer paper and regular red cardstock. I strung them on 1/4" white grosgrain ribbon.

No Sew Valentine Heart Garland

Remember how to cut out hearts? I cut my paper into 3" X 6" pieces (more or less--I stopped measuring after a while) and folded it in half. I just free handed cutting out the hearts. This would be a great project to do with your scissor trained kids. They can cut out hearts all day.

N0 Sew Valentine Heart Garland

When you have your hearts cut out, punch two little holes on the sides. The hole needs to be just big enough to slide the ribbon through. If you wanted to make this a more permanant decoration, I'd recommend putting eyelets in those holes.

No Sew Valentine Heart Garland
String the ribbon through the holes and leave a couple of inches between each heart. All that's left is to find a place to hang it up!

No Sew Valentine Heart Garland

Inspired to make your own heart garland? Share your creation with us here!

Labels: , , , ,

Related Posts Widget for Blogs by LinkWithin
Bookmark and Share

Saturday, December 13, 2008

Make. Pencil and Candy Cane Wrappers

I made some gifts for the students in my son's kindergarten class, Sunday school, etc... I wanted to make something but I didn't want to spend hours on a project like this.

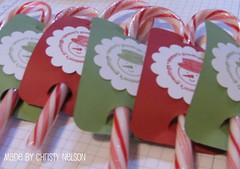
I bought $0.88 candy canes (12 in a pack) and $1 holiday pencils (12 pack). I didn't want to just send the candy or pencils so I made a little wrapper that the item could slip through.


candy cane wrappers

These were quick and simple to make and I think the kids will appreciate them. I chose a non-religious sentiment for the stamp (Season's Greetings) so it would be suitable to send to school. The stamp came from Stampin' UP's Deer Friends set (available to hostesses only).

pencil wrappers

I made enough wrappers that I can send some to my daughter's preschool class as well.

The tutorial for these wrappers can be found in the Learn section.

Labels: , , ,

Related Posts Widget for Blogs by LinkWithin
Bookmark and Share