Saturday, February 28, 2009

Make. Floral Headband

Eva's New Hairband Mosaic

This hairband took approximately 30 seconds to make It would have been quicker but I had to wait for the glue gun to heat up.

Supplies:

hairband (ours we got in a package of 3/$1 at Target)
fake flower
glue gun

Take the flower off the stem and trim it.
Use the glue gun to attach it to the headband.

Wear it.

Pose for some cute pictures.

Enjoy.

Labels: , ,

Related Posts Widget for Blogs by LinkWithin
Bookmark and Share

Thursday, February 26, 2009

February Craft Challenge Winner

Lethargic Lass won the February Craft Challenge! Her entry was the Burlesque Doll and it made a late comeback after the picture frame from Amber surged ahead. Katy (Lethargic Lass) will win a $20 gift card to a craft store and get a free challenge packet.

march craft challenge

I went through the blog post entries. I was going to choose the winner from those that have my button on their website. Nobody. So, I had to do it randomly. The winner is Gigi from Enjoying the Ride. Gigi will receive the March challenge packet for free!

I'm also keeping the signups for March open through today. There are only two spaces left. Get them while the getting is good. The sponsor for March is You Can Make This and they are providing a bundle of 3 great patterns/tutorials to the winner.

I also wrote up a little FAQ page for the challenge so if you want to tell your friends about it, you can refer them there.

Labels: ,

Related Posts Widget for Blogs by LinkWithin
Bookmark and Share

Monday, February 23, 2009

Make. Fat Quarter Handbag

*Follow the link to vote for this month's Christy's Craft Challenge*
*SIGN UP FOR MARCH! Deadline 2/25. Only $5 here*


Not only is this a great project to do, it is my submission for Christy's Craft Challenge. I made this bag using the tutorial found at Sew, Mama, Sew. The supplies listed in the picture are only the ones I used to make the embellishment. To make the bag you will need:

2 fat quarters
fusible interfacing
purse handles
magnetic snap

This was a great tutorial and I had no problem following along. My purse came out so well that as soon as I was finished, I loaded my essentials and went to town.

My flower embellishment includes all of the supplies from the craft challenge (listed above). I ran wrapping paper, felt, and the cotton pad through my Big Kick machine to make the flower. I added the tulle and the pom pom to the top. The pipe cleaner is holding it all together at the back.

I love the bright, cheery colors, and the handbag is destined to be one of my favorites.

Check out the flickr group to add your own projects or to see what others have made.

Labels: , , , ,

Related Posts Widget for Blogs by LinkWithin
Bookmark and Share

February Craft Challenge Poll

Less than 50% of the participants have turned in a picture of their finished craft project. Did February just run away from everyone? C'est la vie. More chances to win for those that finished, right? If you did sign up for the challenge and haven't sent a picture to me yet, do so and I'll add it to the poll.

Up for grabs this month is a $20 gift card to a craft store of the winner's choice and a free month subscription to the challenge.

Be sure to sign up soon for next month's challenge (deadline Feb 25th) at my etsy shop. The prize for March is sponsored by You Can Make This and is a bundle of great patterns worth over $25!

Voting for this month will close at 5pm (Central time) on Feb 26th (Thursday). Good luck!


Labels: ,

Related Posts Widget for Blogs by LinkWithin
Bookmark and Share

Thursday, February 19, 2009

February Craft Challenge Deadlines

march craft challenge

image of Feb Craft Challenge submission from Lethargic Lass on flickr

Have you been working on your submissions, challenge participants? The deadline for the February contest is this Saturday, Feb 21st. You'll want to get your pictures emailed to me (christy AT christynelson DOT net) or upload them to the flickr group by Saturday night. I'll have the poll ready to go Monday morning.

I also ask you to email me the links to your blog posts (if you do one) about the challenge. I will choose a winner from those that will win next month's challenge for free.

Speaking of next month's challenge, you have until Feb 25th to purchase the packet for March. We've got a great prize bundle for the winner from You Can Make This.

Can't wait to see what you all made this month!

Labels: ,

Related Posts Widget for Blogs by LinkWithin
Bookmark and Share

Wednesday, February 18, 2009

Make. Stitch a Name for the Mother's Day Project


Janelle F. King died in Baghdad on August 14, 2008. Her hometown is Merced, CA and she was 23 years old. She was a health care specialist in the 115th Combat Support Hospital and she died from a "non combat-related cause". She was laid to rest at Fort Sill in Lawton, OK.

I know all of this about Janelle because of The Mother's Day Project. I volunteered to stitch a name of a woman that died while serving our country and hers was sent to me. I didn't know how profoundly this would affect me. Merced is just about 20 miles from where I lived as a child. Lawton isn't far from where I lived as a young adult. Her cousin, LaVeta King, said about her, "She lived her life from one passionate whim to another". She loved the Food Network. I'm glad that I have this opportunity to share a little bit about her here on my site.

Mothers Day Project Stitching

I didn't know exactly what to expect with this project. It started out as a way to draw attention to the human cost of the Iraq War. No matter what your views on the war, the fact is that people are putting their lives on the line and some of them don't return. This was my small way to pay tribute and be a part of something bigger than me.

They are still looking for volunteers to stitch names. Send your contact information to mothersdayproject AT sbcglobal DOT net if you would like to participate.

I also wrote a little bit about the project at Crafty Nation. You can see my blog post there.

Labels: , ,

Related Posts Widget for Blogs by LinkWithin
Bookmark and Share

Tuesday, February 17, 2009

Buttons

If you placed my button on your blog, THANK YOU! However, I had to change where it was hosted so you will need to replace the code that you copied and pasted from my site. The new code is in my sidebar. Please replace those. Sorry for the inconvenience!
Related Posts Widget for Blogs by LinkWithin
Bookmark and Share

Saturday, February 14, 2009

Learn. How to Make a Pendant With Hodgepodge Hardware

Hodgepodge Hardware Pendant

I was inspired to make a pendant using hodgepodge hardware from Stampin' UP after seeing such great pendants popping up all over the place. I didn't really know what I was doing and I was winging it. Considering my lack of plan, I think it turned out really well.

Hodgepodge Hardware Pendant

Supplies used:

2 pieces oval hodgepodge hardware in silver
2 brads from the hodgepodge hardware were also used to hold it together while it dried
small scrap of double sided designer paper
chipboard heart
classic ink (color rose red)
crystal effects
marker


The great thing about this kind of pendant is that they should really be designed to be one of a kind. So, think of these instructions as a guide to help you create a pendant that is perfect for you!

The first thing you'll want to do is cut your paper to fit inside the hardware. You can embellish it however you please. This would be really cute as an initial pendant, too. I chose a chipboard heart. I used my stamp ink to color it red and then adhered it to the paper using crystal effects.

At this time, I sandwiched the paper in between the hardware and began filling the oval (with the chipboard heart) with crystal effects. If you do this slowly, it will pool and make a glassy smooth finish. To hold the pieces of hardware together, I put two brads in the holes.

Set it aside to dry.

Hodgepodge Hardware Pendant (reverse side)

The next day I worked on the reverse side. This can be a truly reversible pendant and that is why I chose double sided paper. I only had to use one small scrap to make this. I took a marker and wrote the word "Love" on the back. I then did the same thing with the crystal effects as the other side and filled in the oval. I set that aside to dry.

This is a fun project to let your creativity run wild. Turn your hardware the other way and add beads to the bottom to have a dangling pendant. Use the square hardware for a completely different look. Instead of adding a chain, use your beading skills and make your own necklace to match.

Inspired to make your own? Share pictures of your finished project here.

Labels: , , , , ,

Related Posts Widget for Blogs by LinkWithin
Bookmark and Share

March Craft Challenge Sponsor

I'm pleased to announce that we have a sponsor for the March Craft Challenge. You Can Make This is full of patterns, ebooks, and resources for anyone that wants to make it themselves!

Participants in the March Christy's Craft Challenge have the opportunity to win a bundle of great patterns from You Can Make This.

She Loves Me, She Loves Me Knot Handbag
The Duet Apron Set
Reversible Wrap Skirt

Take a look at their site and check out all of the great things you can make!

If you want a chance to win this prize, be sure to sign up for the March challenge. You have until February 25th.

Labels:

Related Posts Widget for Blogs by LinkWithin
Bookmark and Share

Wednesday, February 11, 2009

Learn. How to Make a Hanging Bouquet from Pottery Barn Kids

Hanging Bouquet Tutorial

I was looking around Pottery Barn Kids online for some ideas for my house. I saw these hanging bouquets and I knew I could make my own! These aren't the kind of supplies I keep around my house so I had to go to a craft store.

Hanging Bouquet Tutorial

Supplies needed:

styrofoam ball
silk flowers (approximately 80-100)
ribbon
safety pin
glue

Everything was on sale and I spent just over $11 for the supplies.

Hanging Bouquet Tutorial

Most silk flowers you can just pull off the stem. These were perfect because there were a lot to a stem and they were multi-colored. The little stem hanging off is perfect to punch into the styrofoam.

Hanging Bouquet Tutorial
Because this is going to be hanging from the ceiling, I didn't do anything more to the flowers than just punch them in every inch or so. If you want them to be a little more permanent, go ahead and dip the stems in glue before pushing them in.

Hanging Bouquet Tutorial

The most difficult part of this project is the hanger. Cut a length of ribbon (doubled). Add a safety pin to join both ends. Dab some glue on there and then stuff the safety pin into the styrofoam.

Hanging Bouquet Tutorial

Let it dry a while before trying to hang your bouquet.

This project was so quick and easy. Your kids could really do it themselves and be creative with the things that put on their bouquet. The options are endless.

Hanging Bouquet Tutorial

I think my daughter will really like having this hang over her bed. Want to make one for your home? Share your finished projects at the flickr group.

Labels: , , , , , ,

Related Posts Widget for Blogs by LinkWithin
Bookmark and Share

Tuesday, February 10, 2009

Fat Quarter Swap

I'm joining the fat quarter swap over at Sew, Mama, Sew! Care to join me?

You send out 4 fat quarters to other crafters around the country (or world!) and you get 4 in return. I haven't participated in a swap in a long time and this one felt about my speed. I can definitely place a flat quarter in an envelope.

With just two fat quarters you can make a bunch of these quilted coasters!

Labels: , , ,

Related Posts Widget for Blogs by LinkWithin
Bookmark and Share

Monday, February 09, 2009

Learn. How to Bind Off Knitting School Lesson 6

If you've been following along with the knitting school, you should be ready now to bind off. This is our last lesson.

I should mention that for me, I prefer to have a longer cowl so I am adding rows at the end to make it longer. Adding about 10 more rows was perfect for me and I have enough yarn to do it.

I'm only including one video tutorial of the bind off. Left handed knitters should be able to figure out exactly how to bind off by watching the right handed tutorial.


Once you are done with your bind off, take a tapestry needle or crochet hook and weave in your ends. You'll just want to wrap them around your finished stitches so they blend in with your knitting. Trim the edges and then enjoy!

Don't forget to post pictures of your finished projects at the Share with ChristyNelson.Net flickr group.

Labels: , , ,

Related Posts Widget for Blogs by LinkWithin
Bookmark and Share

Sunday, February 08, 2009

February Craft Challenge

Are you ready to rumble? By now you should have received your craft challenge packets for February. Are you inspired? Confused? You have a few weeks to come up with something fantastic and get your projects finished. No pressure!

If you haven't joined the flickr group yet, please do so! You can ask questions there and see pictures of projects from other participants.

March packets are now on sale in my etsy shop. Those of you that would like to participate but don't have an etsy account, please contact me via email. I can send you a paypal invoice or you can send me a check.

Have fun with the challenge this month!

Labels: ,

Related Posts Widget for Blogs by LinkWithin
Bookmark and Share

Friday, February 06, 2009

Handmade Valentine Goodies

There is no way I have enough time to show you how to make some of the cute handmade valentine goodies out there and I'm sure you don't always have the time to make them yourself, either. So, I thought today I would feature a few items I've found that you might enjoy.

Wood Conversation Hearts. These are really adorable and can be made into magnets as well. My sister-in-law emailed me about these (her sister makes them) and I thought they were great. I don't know if she does custom lettering but it would be easy to put more sayings or letters on the back so you could use them year round. I was thinking I could have my daughter's name spelled out and use them in her room.


Valentine Cupcake Ouchless Ponytail Holders. These are so cute, but not "too cute" that even an adult could rock one of these in her ponytail. They are also great for Valentine's Day but but aren't so obvious that you couldn't use these year round. Adorable. Versatile Love it.


Be My Valentine Spa & Gift Package. For me, this is all about the packaging. I love it. For $20, you get body butter, soap, a candle and a sachet all ready for gift giving. I wonder if there are any husbands out there reading this? It would make an excellent gift!


Prescription For Love Amigurumi Pill. This item comes from the winner of last month's Christy's Craft Challenge, Chimera Crochet. Her little pills are some of her best sellers and are so adorable. I've seen them in person and they can't help but make you smile. Do you need to write your husband a prescription for love?

Labels: ,

Related Posts Widget for Blogs by LinkWithin
Bookmark and Share

Thursday, February 05, 2009

Make. Quilted Coasters

Quilted Coaster Set

I needed to make a quick wedding gift for one of my husband's students. I thought some coasters would be a nice, useful gift. Since I don't know what her home looks like, I chose red and black. This might not seem like a logical choice but those are the University colors and she's from China so the red signifies good luck. I made six coasters from 2 coordinating fat quarters.


Quilted Coaster Set

This is to show you why I still pay other people to sew for me most of the time. This isn't even the worst one. Oh well. On the other side, you can hardly tell. They are reversible!

Quilted Coaster Set

I based these loosely on the pattern found in the book, Last-Minute Patchwork + Quilted Gifts.
I just cut out 5 X 5 squares, seamed them up right sides together with a piece of low loft batting, turned them right side out and started stitching around to quilt it. All total they probably took just over an hour to do.

Feel like making some yourself? Post pictures of your finished project at my flickr group.

Labels: , , , ,

Related Posts Widget for Blogs by LinkWithin
Bookmark and Share

Tuesday, February 03, 2009

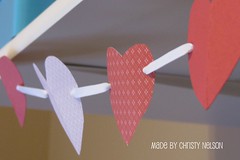
Make. No Sew Valentine Heart Garland

No Sew Valentine Heart Garland

This heart garland was made because I am mostly a lazy crafter. I wanted to make a little heart garland like some I've seen where they sew paper in a sewing machine. But, I realized that I have blue thread in my machine and I was too lazy to change it. Instead, I came up with a different way to hang my heart garland and I like it a lot!

No Sew Valentine Heart Garland

You need the most basic of supplies. Paper, scissors, ribbon, and a hole punch. I used double sided designer paper and regular red cardstock. I strung them on 1/4" white grosgrain ribbon.

No Sew Valentine Heart Garland

Remember how to cut out hearts? I cut my paper into 3" X 6" pieces (more or less--I stopped measuring after a while) and folded it in half. I just free handed cutting out the hearts. This would be a great project to do with your scissor trained kids. They can cut out hearts all day.

N0 Sew Valentine Heart Garland

When you have your hearts cut out, punch two little holes on the sides. The hole needs to be just big enough to slide the ribbon through. If you wanted to make this a more permanant decoration, I'd recommend putting eyelets in those holes.

No Sew Valentine Heart Garland
String the ribbon through the holes and leave a couple of inches between each heart. All that's left is to find a place to hang it up!

No Sew Valentine Heart Garland

Inspired to make your own heart garland? Share your creation with us here!

Labels: , , , ,

Related Posts Widget for Blogs by LinkWithin
Bookmark and Share

Monday, February 02, 2009

Virtual Stamp Workshop

Stampin' Up's Sale-a-Bration is going on now through March 31st. With every $50 order, you can choose one item from the sale-a-bration catalog for free.

It is the BEST time of the year to buy products from Stampin' UP. You can order online at my website or contact me via email to place an order.

If you're interested in hosting a virtual stamp workshop, leave a comment with your contact information or email me at christy AT christynelson DOT net. I think it would be fun to do during this promotion.

What You Do:
  • You "host" on your blog by inviting your readers to order from my Stampin' UP website.
  • You don't have to clean your house, collect orders or money, or deliver product.
What I Do:

  • I will post a special stamp project on your blog.
  • I will send you a brand new Spring/Summer idea book and catalog
  • I will give you 20% off anything you want to order regardless of whether or not anyone else orders.
  • I will give you hostess benefits based on the sales generated from your blog.

Labels: , , ,

Related Posts Widget for Blogs by LinkWithin
Bookmark and Share

Make. Upsy Daisy Birthday Card

Upsy Daisy Birthday Card

My birthday card supply has been dwindling so I thought I would make a few cards using my Upsy Daisy stamp set. It is a great set to use with the heat embossing technique.

My color inspiration was aqua and red. As with most of my finished cards, this one didn't turn out like I first imagined it might. But, I like it. I wanted more aqua and red but it turned out that black made more sense as the main color with just red and aqua accents.

Upsy Daisy Birthday Card

Supplies used all Stampin' UP unless otherwise specified:

Paper- whisper white, cool caribbean (retired), basic black
Stamp Set- Upsy Daisy
Ink- Versamark, basic black
Adhesive- mono adhesive
Embossing powder- Stampendous Pearlustre Ruby
Accessories- Crop-a-dile large eyelets
Tools- heat gun, embossing buddy, powder pals, Crop-a-dile, paper trimmer

Labels: , , ,

Related Posts Widget for Blogs by LinkWithin
Bookmark and Share